

Harmony 650 Remote Control Manual: An Overview
Discover the Logitech Harmony 650’s capabilities with this guide, exploring features and functionality; review the user agreement for optimal experience and enjoyment․
Welcome to the world of simplified home entertainment control! The Logitech Harmony 650 is a universal remote designed to consolidate all your infrared (IR) controlled devices into one convenient hub․ This eliminates the clutter of multiple remotes and streamlines your viewing experience․ Originally released to a market eager for simplification, the Harmony 650 continues to be a popular choice for its ease of use and broad device compatibility․
This manual will guide you through the setup process, from installing batteries and connecting to your devices, to configuring activities that automate complex commands․ Whether you’re a tech enthusiast or a first-time user, the Harmony 650 offers a user-friendly interface and powerful features to enhance your entertainment setup․ Prepare to take control of your home theater with this versatile remote!
What’s Included in the Box
Upon opening your new Logitech Harmony 650 package, you’ll find several key components to get you started․ The box contains the Harmony 650 remote control itself, designed for comfortable and intuitive operation․ You will also receive a USB cable, essential for initial setup and software updates via your computer․
Additionally, the package includes two AA batteries to power the remote, allowing for immediate use․ A quick start guide is provided, offering a simplified overview of the setup process․ Finally, you’ll find important safety and warranty information․ Please ensure all listed items are present before proceeding․ Retain the original packaging for potential warranty claims or returns․

Setting Up Your Harmony 650
Begin your journey with easy setup! Install batteries, connect to devices using the app or wizard, and configure activities for seamless control․
Installing Batteries
To begin using your Harmony 650 remote, you’ll first need to install the batteries․ Locate the battery compartment, typically on the back of the remote․ Gently slide open the compartment cover․ Insert the required number of batteries – usually two AA or AAA batteries – ensuring you match the positive (+) and negative (-) terminals with the markings inside the compartment․
Incorrect battery installation can prevent the remote from functioning correctly․ Once the batteries are securely in place, slide the compartment cover back on until it clicks shut․ If the remote doesn’t power on after installing the batteries, double-check the battery polarity and ensure the batteries are fresh․ Replacing old or weak batteries is crucial for optimal performance and reliable operation of your Harmony 650 remote control․

Connecting to Your Devices
The Harmony 650 excels at controlling multiple devices․ Connection is primarily achieved through the Logitech Harmony app, offering a streamlined setup process․ Ensure your remote and smartphone or tablet are connected to the same Wi-Fi network․ Download and install the Harmony app from your device’s app store․
Within the app, you’ll add each device – TVs, cable boxes, receivers, and more – by selecting the brand and model number․ The app boasts an extensive device database․ Follow the on-screen prompts to complete the connection for each device․ Alternatively, you can utilize the remote’s setup wizard for a guided experience, though the app offers greater flexibility and control over device configuration․ Successful connection is vital for seamless control․
Adding Devices Using the App
To add devices via the Harmony app, begin by launching the app and navigating to the “Devices” section․ Tap the “+” icon to initiate the device addition process․ The app will prompt you to select the type of device you wish to add – TV, receiver, Blu-ray player, etc․
Next, you’ll search for your device’s brand and model number․ The Harmony app features a comprehensive database, simplifying this step․ Once located, follow the on-screen instructions, which may involve testing commands to ensure proper functionality․ The app guides you through IR blasting and network connectivity setup; Confirm successful addition, and repeat for each device you intend to control with your Harmony 650․
Using the Setup Wizard
The Harmony 650’s Setup Wizard streamlines initial configuration․ Begin by connecting the remote to your computer via USB and launching the Harmony software․ The wizard guides you through creating a Harmony account or logging into an existing one․ It then prompts you to select the devices you want to control, offering a vast library of brands and models․
Follow the on-screen prompts to configure each device, testing commands to verify functionality․ The wizard assists with IR blasting and network setup, ensuring seamless integration․ It also helps create basic Activities – pre-programmed sequences for common tasks like “Watch TV” or “Watch a Movie”․ Complete the wizard, and your Harmony 650 is ready for personalized customization․
Configuring Activities
Activities are the heart of the Harmony 650 experience, allowing one-touch control of your entertainment system․ To begin, access the Activities section within the Harmony software․ The wizard guides you through creating new Activities, selecting the devices involved and the desired starting commands․ For example, a “Watch Movie” Activity might power on your TV, receiver, and Blu-ray player․

Customize each Activity by adding or removing devices, adjusting command sequences, and setting delays․ You can also add pauses for specific actions․ The Harmony 650 supports complex Activities involving multiple devices and steps, simplifying your home theater experience․ Regularly reviewing and refining Activities ensures optimal performance and convenience․
Creating Custom Activities
To craft a personalized experience, start by selecting “Create Activity” within the Harmony software․ Name your Activity – for instance, “Gaming Night” or “Listen to Music”․ Next, choose the devices that participate in this Activity; the software intelligently suggests relevant options․ Define the initial power-on sequence, specifying the order in which devices should activate․
Refine the Activity by adding commands for common actions like pausing, volume control, and input selection․ Utilize the “Add Command” feature to incorporate specific buttons or macros․ Test the Activity thoroughly to ensure seamless operation․ Remember to save your custom Activity for quick access and future modifications, tailoring your Harmony 650 to your unique entertainment setup․
Editing Existing Activities
To modify a pre-set Activity, navigate to the “My Activities” section within the Harmony app or software․ Select the Activity you wish to adjust and choose the “Edit” option․ You can then alter the device sequence, changing the order in which devices power on or off․ Adjust individual device commands, adding, removing, or remapping buttons as needed․
Fine-tune the Activity’s behavior by modifying delays between commands or adding new macros for complex actions․ Thoroughly test your changes after each edit to ensure everything functions as expected․ Save the updated Activity to apply your modifications․ This allows for continuous personalization, adapting your Harmony 650 to evolving entertainment needs and preferences․
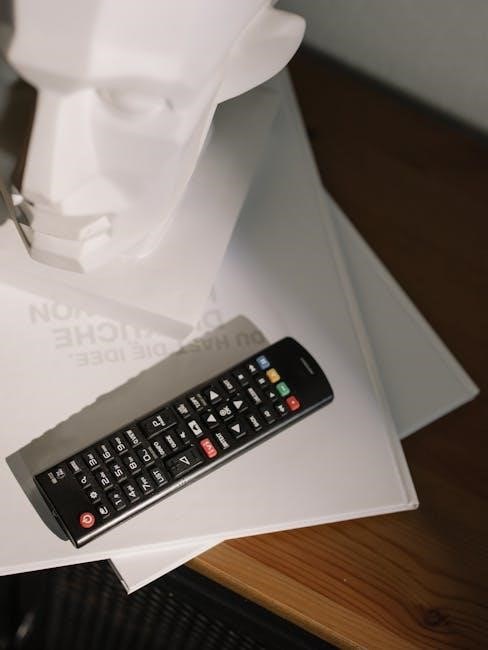
Understanding the Remote Layout
Familiarize yourself with the Harmony 650’s button arrangement, touchpad, and menu navigation for seamless control of your home entertainment system․
Button Functions Explained
The Harmony 650 boasts a comprehensive button layout designed for intuitive control․ The power button, predictably, turns devices on and off․ Volume controls adjust audio levels, while channel up/down navigate through television channels․ The mute button silences audio instantly․ Dedicated device buttons allow quick switching between connected equipment – TVs, cable boxes, Blu-ray players, and more․
The activity buttons initiate pre-programmed sequences, like “Watch a Movie,” automating multiple device actions․ The menu button accesses on-screen menus for devices․ The directional pad facilitates navigation within menus and content․ Contextual buttons, varying by device, offer specific functions․ The ‘Back’ button returns to the previous screen․ Understanding each button’s purpose unlocks the remote’s full potential, streamlining your entertainment experience and eliminating the need for multiple remotes․
Navigating the Menu
The Harmony 650’s menu system, accessed via the dedicated ‘Menu’ button, provides access to settings and customization options․ Utilize the directional pad – up, down, left, and right – to highlight menu items․ Press the ‘OK’ or center button to select the highlighted option․ The ‘Back’ button returns to the previous menu level, allowing you to retrace your steps easily․
Within the menu, you can adjust device settings, manage activities, and customize button layouts․ Explore options for renaming devices, updating firmware, and troubleshooting connection issues․ The menu structure is logically organized, making it relatively straightforward to find specific settings․ Remember to save any changes made before exiting the menu to ensure they are applied․ Familiarizing yourself with the menu navigation is key to maximizing the remote’s functionality․
Using the Touchpad
The Harmony 650 features a responsive touchpad, offering an alternative to traditional button-based navigation․ Gently slide your thumb across the touchpad to control on-screen cursors․ A light touch is all that’s needed; excessive pressure won’t improve performance․ The touchpad is particularly useful for navigating streaming services and apps with complex interfaces․
You can customize the touchpad sensitivity within the remote’s settings menu, adjusting it to your preference․ Experiment with different sensitivity levels to find what feels most comfortable․ The touchpad also supports gestures, such as swiping to change channels or volume․ Refer to the full manual for a complete list of supported gestures․ Regular cleaning of the touchpad ensures optimal responsiveness and accuracy․
Troubleshooting Common Issues
Resolve frequent problems like unresponsive remotes, device control failures, or activity malfunctions with this section’s guidance for a seamless experience․
Remote Not Responding
If your Harmony 650 remote isn’t responding, begin with basic checks․ First, ensure fresh batteries are correctly installed, verifying polarity․ Attempt a remote reset by removing and reinserting the batteries․ Confirm there’s no physical obstruction blocking the IR signal path to your devices․
Next, try re-pairing the remote with your Harmony Hub, if applicable, through the Harmony app․ Sometimes, interference from other devices can cause issues; move away from potential sources like fluorescent lights or other IR emitters․ If the problem persists, consult the Logitech Harmony support website for advanced troubleshooting steps, including firmware updates for both the remote and the Hub․ A factory reset, as a last resort, might resolve stubborn connectivity problems, but remember this will erase all your current settings․
Device Not Controlling
When a device isn’t responding to your Harmony 650, first verify the device is powered on and within range of the remote or Harmony Hub․ Double-check that the correct input source is selected on your TV or receiver․ Within the Harmony app, confirm the device is correctly added and configured with the appropriate device type and manufacturer․
Sometimes, signal interference can be the culprit; ensure a clear line of sight between the Hub (if used) and the device․ Try re-syncing the device commands within the app․ If issues continue, explore the Logitech support website for updated device commands or troubleshooting specific to your device model․ A firmware update for the Harmony Hub can also resolve compatibility issues․ Finally, consider deleting and re-adding the device within the app․
Activity Not Working Correctly
If an Activity isn’t functioning as expected, begin by verifying all devices involved are correctly added and communicating with the Harmony 650․ Within the Harmony app, review the Activity’s settings, ensuring the correct sequence of commands is programmed for each device․ Pay close attention to delays between commands; adjustments may be needed for optimal performance․
Test each device individually to confirm it responds to the remote․ If a specific command within the Activity fails, edit the Activity and try a different command or adjust the timing․ Consider simplifying the Activity by removing unnecessary steps․ Logitech’s support website offers troubleshooting guides and community forums where users share solutions for common Activity issues․ A Hub restart can sometimes resolve unexpected behavior․

Advanced Features & Customization
Unlock the Harmony 650’s full potential through macros and customized button layouts, tailoring the remote to your unique entertainment preferences and needs․
Using Macros
Macros on the Harmony 650 allow you to string together multiple commands, executing them with a single button press – simplifying complex operations․ This feature is incredibly useful for automating sequences like powering on multiple devices, switching inputs, and launching a specific application․ To create a macro, access the Harmony software or mobile app and navigate to the ‘Macros’ section․
You’ll then be prompted to add commands in the desired order․ Ensure each command has sufficient ‘delay’ time to allow the device to process it before the next command is sent․ Test the macro thoroughly after creation to ensure it functions as expected․ You can edit existing macros to refine their performance or add new commands․ Remember to name your macros descriptively for easy identification․ Properly configured macros can dramatically enhance your viewing experience, reducing the need for repetitive button presses and streamlining your home entertainment setup․
Customizing Button Layouts
The Harmony 650 offers extensive customization of its button layouts, allowing you to tailor the remote to your specific needs and preferences․ Through the Harmony software or mobile app, you can reassign functions to individual buttons, creating a truly personalized experience․ This is particularly useful for frequently used commands or those that aren’t readily accessible on the default layout․
To begin customizing, access the ‘Button Layout’ section within the software․ You can then select a button and assign it a new function from a comprehensive list of options․ Consider prioritizing buttons for your most-used devices and activities․ Experiment with different layouts to find what works best for you․ Remember to save your changes and test the new configuration thoroughly․ A well-customized button layout can significantly improve the efficiency and convenience of your Harmony 650 remote․
Resources & Support
Access the Logitech Harmony support website for FAQs, troubleshooting, and additional assistance․ Explore online communities for user tips and helpful solutions․
Logitech Harmony Support Website
The official Logitech Harmony support website is your primary destination for comprehensive assistance with your Harmony 650 remote control․ Here, you’ll find a wealth of resources designed to resolve common issues and maximize your entertainment experience․ Explore a detailed knowledge base filled with articles covering setup, troubleshooting, and advanced features․
Download the latest software and firmware updates to ensure optimal performance and compatibility with your devices․ Access downloadable manuals, including a complete Harmony 650 user guide, offering step-by-step instructions and detailed explanations of all functionalities․ You can also find helpful video tutorials demonstrating various setup procedures and troubleshooting techniques․
Utilize the online community forums to connect with other Harmony users, share tips, and seek assistance from experienced individuals․ Logitech’s support team is also available through online chat or email for personalized support․ The website provides direct links to register your product and access warranty information, ensuring a seamless support experience․
Frequently Asked Questions (FAQ)
Q: My Harmony 650 isn’t responding․ First, ensure fresh batteries are installed correctly․ If the issue persists, try resetting the remote by removing and reinserting the batteries․ Q: How do I add a new device? Utilize the Harmony app or the setup wizard on your TV to guide you through the device addition process, ensuring compatibility․
Q: Why isn’t my activity working correctly? Verify all devices within the activity are properly configured and communicating with the Harmony 650․ Check device order and power settings․ Q: Can I customize the button layout? Yes, the Harmony app allows for extensive customization of button layouts to suit your preferences․
Q: Where can I find troubleshooting assistance? Refer to the Logitech Harmony support website for detailed troubleshooting guides and FAQs․ Contact Logitech support directly for personalized help․ Q: Does the Harmony 650 support macros? Absolutely, you can create macros to automate complex sequences of commands for a streamlined experience․